Spooky Halloween Snacks
 Things are about to get spooky! Have some fun this Halloween with some scary-looking treats you and the kids can make to snack on. These kid-friendly recipes mean the kids can help you prepare them before they all get devoured.
Cocktail Sausage Mummies
Makes 24
Prep Time: 20 minutes
Cook Time: 30 minutes
Ingredients:
- 24 beef chipolata sausages
- 1 egg, lightly whisked
- 4 sheets (25 x 25cm) ready rolled puff pastry
- American mustard, to decorate
- Tomato sauce, to serve
Method:
- Preheat oven to 200°C, an Air Fryer will also work as an alternative*. Line 2 baking trays with baking paper.
- Preheat grill on medium-high. Cook sausages under preheated grill, turning, for 6-8 minutes or until golden brown and cooked through. Remove from grill and set aside to cool. This step can also be done with a frying pan on the cooktop, just add some oil to the pan before cooking sausages.
- Use a small sharp knife to cut the pastry into 1cm-thick strips. Lightly brush pastry with a little egg. Wrap 2-3 pastry strips around each sausage to resemble bandages, leaving a little gap at one end for the face. Trim and discard excess pastry. Place on the lined tray. Repeat with remaining sausages, pastry and egg.
- Bake in preheated oven, swapping trays halfway through cooking, for 20-25 minutes or until golden brown and puffed. Remove from oven and set aside to cool slightly. Use the American mustard to decorate the mummies with eyes. Place on a serving platter, serve with mustard and tomato sauce.
*Note: You can also use an Air Fryer to bake these sausage mummies. Depending on your Air Fryer’s size and cooking capacity, you may have to cook in batches.
Recipe by Sarah Hobbs, as appeared on Taste.

Halloween Party Cutout Cookies
Makes: 2 dozen
Prep: 1 hour
Bake: 10 minutes
Ingredients:
- 1/2 cup butter, softened
- 3/4 cup sugar
- 1 large egg, room temperature
- 1 teaspoon vanilla extract
- 1-1/2 cups all-purpose flour
- 1 teaspoon baking powder
- 1/2 teaspoon salt
Frosting
- 3-3/4 cups confectioners’ sugar
- 1/4 cup butter at room temp
- 4 to 6 tablespoons water
- Yellow, orange, green and black paste food coloring, optional
- Lollies for frosting, optional
Method:
- In a large bowl, beat butter and sugar until light and blended. Beat in egg and vanilla. In another bowl, whisk flour, baking powder and salt; gradually beat into creamed mixture. Shape dough into 2 portions. Shape each into a disk; wrap and refrigerate 1 hour or until firm enough to roll.
- Preheat oven to 350°. On a lightly floured surface, roll each portion of dough to 1/4-in. thickness. Cut with floured 2-1/2-in. Halloween-shaped cookie cutters. Place 2 in. apart on ungreased baking sheets. Bake 8-10 minutes or until edges are light brown. Remove from pans to wire racks to cool completely.
- In a large bowl, beat confectioners’ sugar, butter and enough water to reach spreading consistency. Tint frosting and decorate as desired with your favourite Halloween lollies. Let stand until set.
Recipe modified from TasteofHome.com.

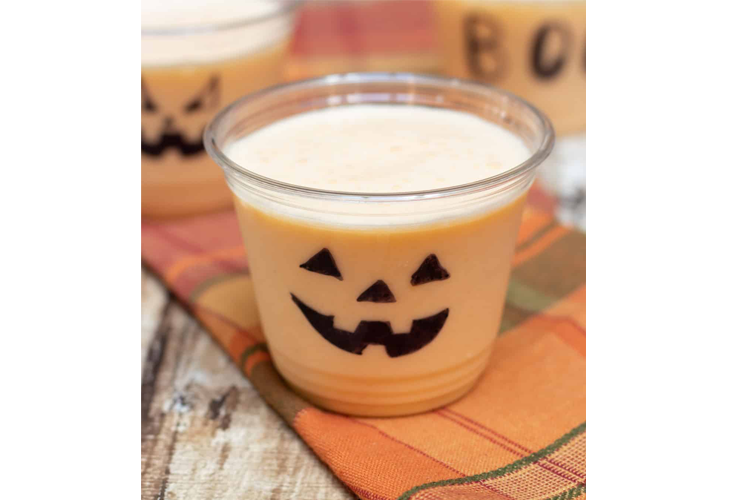
Orange Peach Halloween Smoothie
Serves 2
Prep Time: 5 minutes
Ingredients:
- 1 cup orange juice
- 1 cup milk of your choice
- ½ cup plain Greek yoghurt
- 1 teaspoon vanilla
- 2 tablespoons honey
- 1 medium ripe banana
- 1 cup frozen peaches unthawed*
- 3 drops orange food colouring, optional
Method:
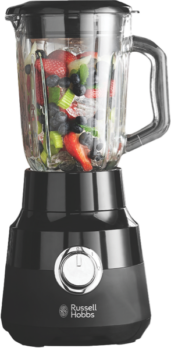
- In the blender jug, combine orange juice, milk, yoghurt, vanilla, honey, banana and frozen peaches.
- Blend until smooth.
- If you’d like a deeper orange colour, add a few drops of orange food colouring until you reach the desired colour.
- Serve immediately.
Note: For Halloween fun, have kids decorate clear plastic cups with a permanent marker and make fun faces or sayings on the cups.
*You can also freeze canned peaches if frozen peach slices aren’t available.
Recipe by Brenda Thompson of Meal Planning Magic.
Halloween Spiderweb Cheesecake
Serves 12
Prep Time: 20 minutes
Cook Time: 4+ hours, requires refrigeration overnight
Ingredients:
- 1kg cream cheese (softened)
- 250g Choc Ripple biscuits (crushed)
- 185g butter (melted)
- 1 tsp sea salt
- 1 1/2 cup caster sugar
- 1/4 cup lemon juice
- 375ml thickened cream (whipped)
- 12g gelatine powder
- 60g dark chocolate melts
- 1/4 cup cream
Method:
- Line a 25cm springform tin with baking paper.
- Put the crushed biscuits, melted butter and sea salt in a large bowl and mix until well combined.
- Press the mixture over the base and up the sides of the springform tin. Refrigerate while you make the filling.
- To make the filling, beat the cream cheese until smooth. Gradually beat in the sugar and beat until light and fluffy. Add the lemon juice and beat until combined.
- Now add half of the whipped cream, beat until it’s all combined, then add the remaining whipped cream. Basically, you are adding the whipped cream in two batches to ensure it all amalgamates properly.
- Dissolve the gelatine in 1/4 cup of boiling water and stir vigorously until the gelatine dissolves. Add the gelatine to the cream cheese mixture and beat to combine.
- Pour the filling into the crust.
- To make the ganache, melt the chocolate and cream together in the microwave in short 30 second bursts, stirring in between.
- Put the ganache into a piping bag with 1mm tip. Starting at the centre of the cake, pipe a spiral over the top, with the lines 1.5cm apart. When that’s done, run a skewer through the ganache, starting in the centre and finishing at the edge of the circle. Do this every 3cm to form a spiderweb.
- Refrigerate overnight and decorate with spiders to serve.
Notes:
- You can create an edible spider out of jubes and liquorice if you want to.
- The lemon juice in the filling will set this cheesecake overnight but using a sachet of gelatine will ensure your cheesecake sets in time for the party if you can’t wait.
- You can also line the base with a layer of ganache before you add the filling if you’re feeling particularly decadent.
Recipe by Kidspot Editor, as appeared on Kidspot Kitchen.